It’s probably safe to say that every developer wants to brighten up their app with various effects. Live Typing’s Android department has already released two articles about animation, one of them dealing with the Animator class type, and the other describing a custom library called CannyViewAnimation that we use instead of the
Both iOS developers and designers agree that animation is a key UI element that serves to:
- attract the user’s attention to a specific object
- demonstrate how to use the app in various situations
- visualize navigation logic or screen hierarchy to help the user find their way around the app
- assure the users that their actions actually have effects
- liven up the app, because without animations it might look plain and feel unexciting to use
In other words, animation is a way to lend dynamics to a specific UI element, or the interface in general.
Basic concepts
When talking about animations we can’t go on without first establishing a few fundamental things:
Core Animation is a framework for working with basic animations classes: CABasicAnimation, CAKeyFrameAnimation, CATransition, CAAnimationGroup. Core Animation usage is fully automatic: you don’t have to create cycles and timers to make animations.
CALayer is a set of classes that govern the animation of the object root layer. The classes access the layer and apply one of the properties to it, including properties like layer position and size, layer background color, shadow, rounded corners and so on.
To specify the path to the CALayer properties when creating animations, the animationWithKeyPath method or the keyPath property are used. The latter is assigned in the following string format: @«key_name». For instance:
CALayer *layer = [CALayer layer].opacity
CALayer *layer = [CALayer layer].position
CALayer *layer = [CALayer layer].shadowRadius
We’ll have a closer look at using animationWithKeyPath in the «Examples of explicit animations» section. You can find the full list of properties here:
Animation models
There are two animation models: implicit and explicit.
Implicit animation
Core Animation’s implicit animation model means that all changes in animated properties have to be gradual and asynchronous. Animations will take place without any effects, simply changing from one value to another.
Assuming that the layer`s current position is in (theLayer.position.x, theLayer.position.y)
theLayer.position=CGPointMake(100.0,100.0);
Swift:
theLayer.position = CGPoint(x: 100.0, y: 100.0)
Explicit animation
The explicit animation model requires an animation object to be created and initial and final values to be set. In this case, animation will happen smoothly, changing from one value to another and won’t begin until it’s added to a layer.
Examples:
The set of animation classes inherited from Core Animation:- CABasicAnimation. Provides basic value interpolation for a layer. For instance, you can use this class to move the layer from one location to another, change transparency value and so on. This class can be utilized for attracting the user’s attention to a particular object on the screen, or displaying animated tutorials.
CABasicAnimation *theAnimation;
theAnimation=[CABasicAnimation animationWithKeyPath:@"position"];
theAnimation.duration = 3.0;
theAnimation.repeatCount = 2;
theAnimation.autoreverses = NO //(YES) — Reverses into the initial value either smoothly or not;
theAnimation.fromValue= [NSValue valueWithCGPoint:CGPointMake(screenWidth/2, _animationButton.frame.origin.y)];
theAnimation.toValue= [NSValue valueWithCGPoint:CGPointMake(100, 100)];
[theLayer addAnimation:theAnimation forKey:@"animatePosition"];
Swift:
let theAnimation = CABasicAnimation(keyPath: "position");
theAnimation.fromValue = [NSValue(CGPoint: CGPointMake(screenWidth/2, self.animationButton.frame.origin.y))]
theAnimation.toValue = [NSValue(cgPoint: CGPoint(x: 100.0, y: 100.0))]
theAnimation.duration = 3.0;
theAnimation.autoreverses = false //true - reverses into the initial value either smoothly or not
theAnimation.repeatCount = 2
theLayer.addAnimation(theAnimation, forKey: "animatePosition");
The autoreverses parameter in the first animation is set to YES, and in the second — to NO. This means that the position either doesn’t return to the initial value, or returns to the initial value gradually.
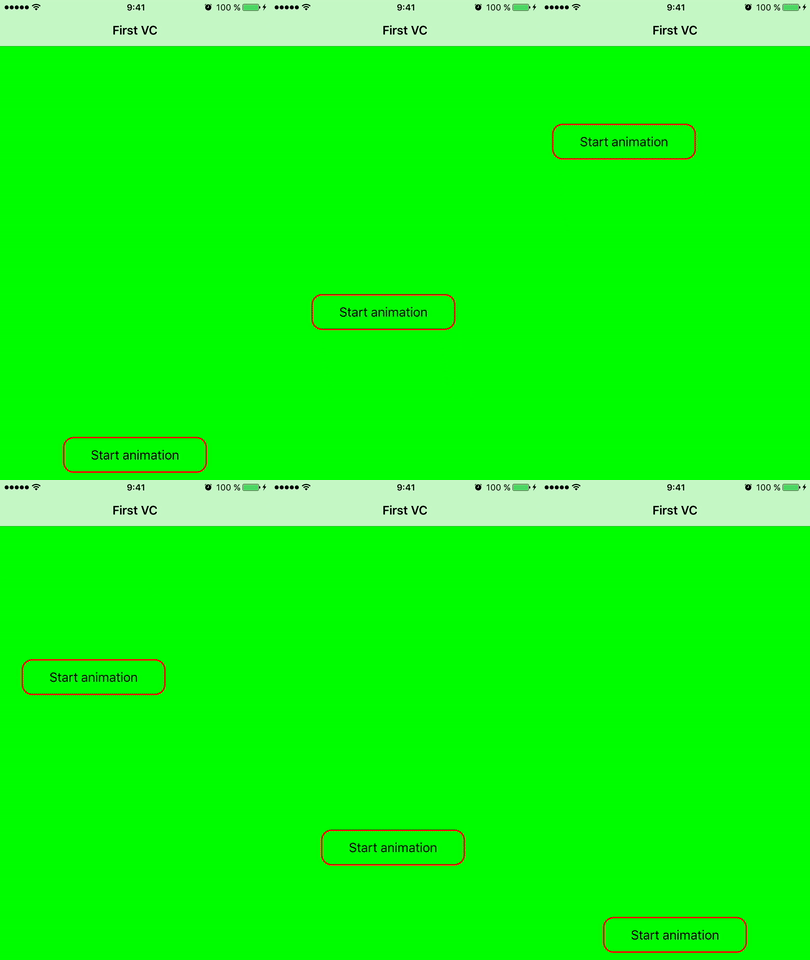
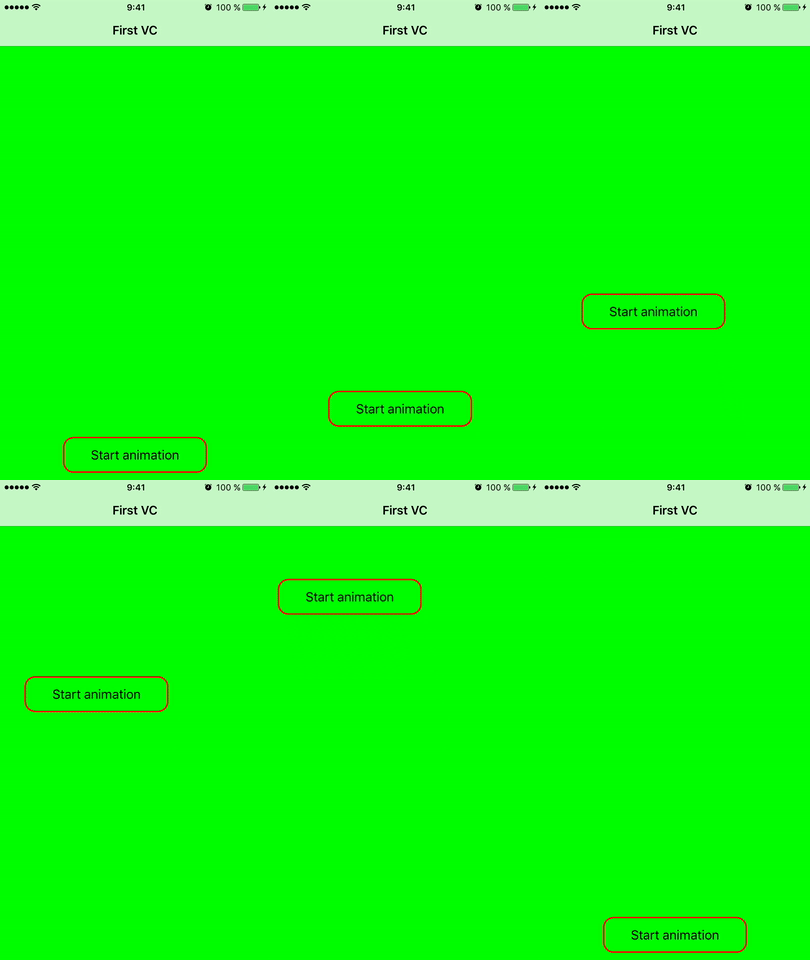
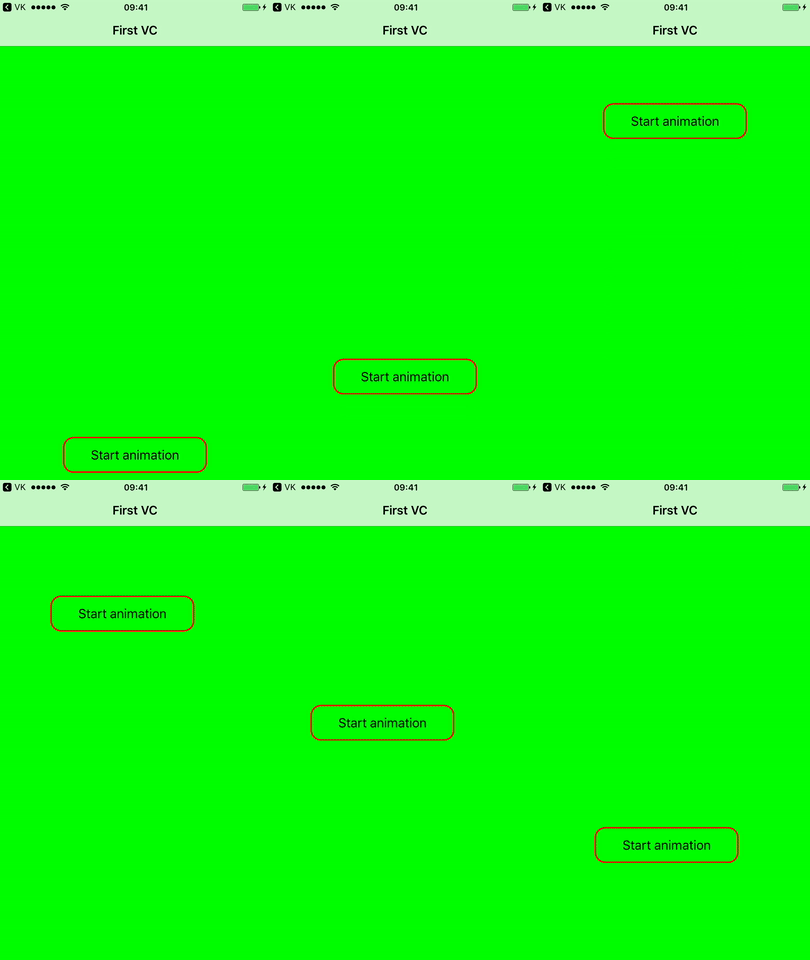
- CAKeyframeAnimation. Makes it possible to change the layer’s property values based on the values specified in the array. To initialize, use animationWithKeyPath while specifying the property to be changed. Also indicate the array of values that will be applied on each of the animation stages. We can assign several values to which the layer will be moved. This is more interesting that simply changing the position from one place to another as in the examples above.
NSArray * pathArray = @[ [NSValue valueWithCGPoint:CGPointMake(10., 10.)], [NSValue valueWithCGPoint:CGPointMake(100., 10.)], [NSValue valueWithCGPoint:CGPointMake(10., 100.)], [NSValue valueWithCGPoint:CGPointMake(10., 10.)], ];
CAKeyframeAnimation *pathAnimation = [CAKeyframeAnimation animationWithKeyPath:@"position"];
pathAnimation.values = pathArray;
pathAnimation.duration = 5.0;
[self.label.layer addAnimation:pathAnimation forKey:@"position"];
Swift:
let animation = CAKeyframeAnimation()
let pathArray = [[NSValue(cgPoint: CGPoint(x: 10.0, y: 10.0))],  [NSValue(cgPoint: CGPoint(x: 100.0, y: 100.0))], [NSValue(cgPoint: CGPoint(x: 10.0, y: 100.0))], [NSValue(cgPoint: CGPoint(x: 10.0, y: 10.0))], ]
animation.keyPath = "position"
animation.values = pathArray
animation.duration = 5.0
self.label.layer.add(animation, forKey: "position")
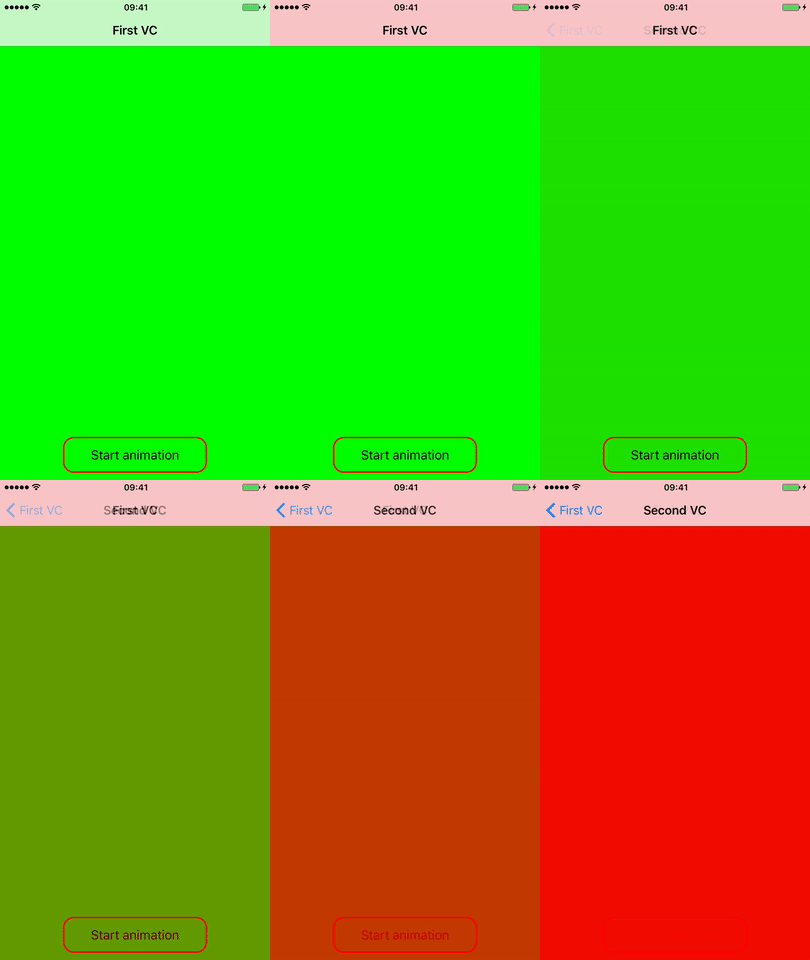
- CATransition. Provides the transition effect that influences the entire layer’s content. It fades out, pushes or reveals the layer’s content during animation. CATransition can be used to switch between UIView or for changing transitions between UIViewController: smooth fading in, fading in from different sides, fading in over the existing content and pushing away the existing content
To implement custom transition between the screens, it is necessary to set the Animated parameter to NO(false) in the pushViewController: animated method.
CATransition *transition = [CATransition animation];
transition.duration = 2.35
transition.timingFunction = [CAMediaTimingFunction      functionWithName:kCAMediaTimingFunctionEaseInEaseOut];
transition.type = kCATransitionFade;
[self.navigationController.view.layer addAnimation:transition forKey:kCATransition];
 [[self navigationController] pushViewController:[NewViewController new] animated:NO];
Swift:
let transition = CATransition()
transition.duration = 2.35
transition.timingFunction = CAMediaTimingFunction(name: kCAMediaTimingFunctionEaseInEaseOut)
transition.type = kCATransitionFade
self.navigationController?.view.layer.add(transition, forKey: nil)
self.navigationController?.pushViewController(ViewController(), animated: false)
Types for transition.type:
- kCATransitionFade. The layer’s content will fade out when it becomes visible or invisible.
- kCATransitionMoveIn. The layer’s content slides over the existing content. Simple transition.subtype subtypes are used with this type.
- kCATransitionPush. The layer’s content pushes away the existing content. Simple transition.subtype subtypes are used with this type.
- kCATransitionReveal. The layer’s content is gradually revealed in the direction specified by the transition subtype. Simple transition.subtype subtypes are used with this type.
Subtypes for transition.subtype:
- kCATransitionFromRight. Transition begins from the right side.
- kCATransitionFromLeft. Transition begins from the left side
- kCATransitionFromTop. Transition begins from the top
- kCATransitionFromBottom. Transition begins from the bottom
You can find the full list of CATransition types and subtypes here:
Types:
→ Swift
→
Subtypes:
→ Swift
→
- CAAnimationGroup. Allows creating an array of animated objects that will be grouped together and function simultaneously.
CABasicAnimation *positionAnimation = [CABasicAnimation animationWithKeyPath:@"position"];
    [posAnimation setFromValue:[NSValue valueWithCGPoint:CGPointMake(_animationButton.frame.origin.x, _animationButton.frame.origin.y)]];
    [posAnimation setToValue:[NSValue valueWithCGPoint:CGPointMake(100, 100)]];
    posAnimation.autoreverses = YES;
//This is important, as this part sets the animation's speed and the period of time after which the animation will begin to play.
    [posAnimation setDuration:10.0];
    [posAnimation setBeginTime:0.0];
CABasicAnimation *heightAnimation = [CABasicAnimation animationWithKeyPath:@"bounds.size"];
heightAnimation.autoreverses = YES;
[heightAnimation setFromValue: [NSValue valueWithCGSize:CGSizeMake(_animationButton.frame.size.width,_animationButton.frame.size.height)]];
[heightAnimation setToValue:[NSValue valueWithCGSize:CGSizeMake(_animationButton.frame.size.width, 200)]];
[heightAnimation setDuration:10.0];
[heightAnimation setBeginTime:5.0];
CAAnimationGroup *group = [CAAnimationGroup animation];
[group setDuration:10.0];
[group setAnimations:[NSArray arrayWithObjects:posAnimation, heightAnimation, nil]];
[_animationButton.layer addAnimation:group forKey:nil];
Swift:
var animations = [CABasicAnimation]()
var posAnimation = CABasicAnimation(keyPath: "position")
posAnimation.duration = 1.0
posAnimation.autoreverses = true
posAnimation.fromValue = [NSValue(cgPoint: CGPoint(x: self.animationButton.frame.origin.x, y: self.animationButton.frame.origin.y))]
posAnimation.toValue = [NSValue(cgPoint: CGPoint(x: 100.0, y: 100.0))]
animations.append(posAnimation)

var heightAnimation = CABasicAnimation(keyPath: "bounds.size")
heightAnimation.autoreverses = true
heightAnimation.duration = 10.0
heightAnimation.fromValue =  [NSValue(cgSize: CGSize(width: self.animationButton.frame.size.width, height: self.animationButton.frame.size.height))]
heightAnimation.toValue = [NSValue(cgSize: CGSize(width: self.animationButton.frame.size.width, height: 200.0))]
heightAnimation.beginTime = 5.0
animations.append(heightAnimation)

let group = CAAnimationGroup()
group.duration = 10.0
group.animations = animations
self.animationButton.layer.addAnimation(group, forKey: nil)
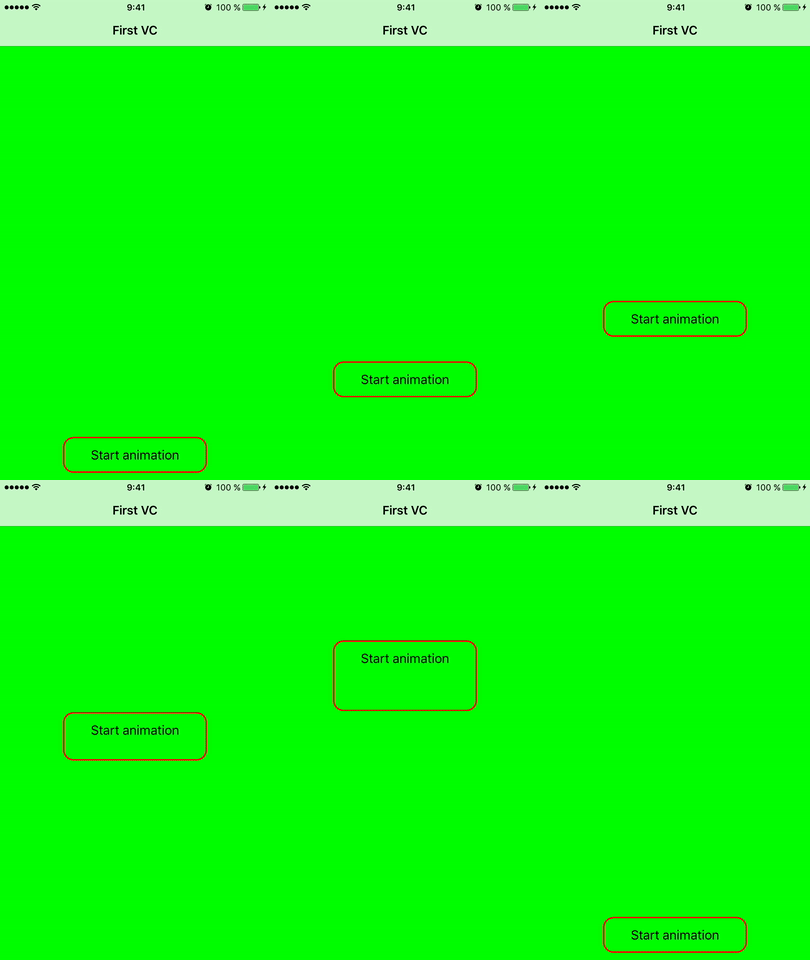
The BeginTime parameter here specifies after what period of time from the start animation will begin to play.
Animated position change begins immediately after the start, and the animation of the button changing its height begins after five seconds.
Deleting animations
We can delete either a layer’s specific animation or all of the animations at once.
Deleting a specific animation
When we created the animation, we specified the @«animateOpacity» key that allows us to access it. To delete the animation, do the following:
Swift: removeAnimationForKey(«animateOpacity»)
Deleting all animations
To delete all of a layer’s animations, you have to send the removeAllAnimations message:
Swift: theLayer.removeAllAnimations()
Animation blocks
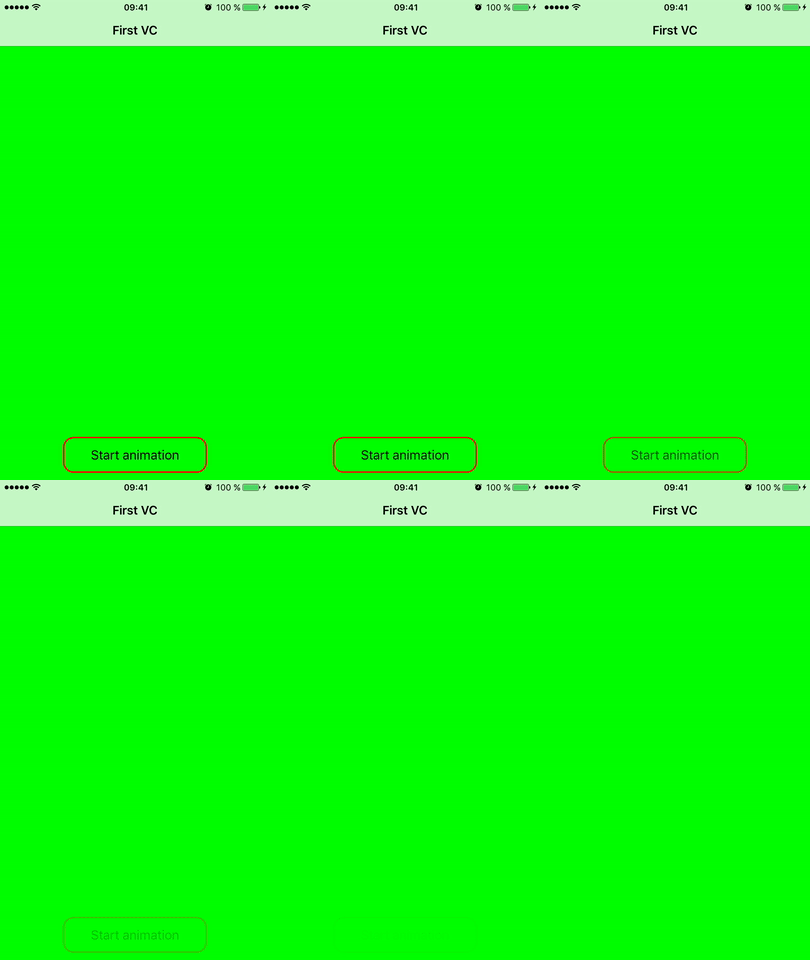
There are two premade blocks that can be used to play the required animation (transparency, position and size change): animations and completion. They have different uses:
- In the Animations block the code is executed during the animation.
- In the Completion block the code is executed after the Animations block is completed.
[UIView animateWithDuration:3.0 animations:^{
                _theButton.alpha = 0.0;
    }];
Swift:
UIView.animateWithDuration(3.0, animations: {
self.theButton.alpha = 0.0
})
Example 2: Changing a button’s position and height.
  CGRect frame = _animationButton.frame;
  frame.origin.y = 100;
  frame.size.height = 200;
  [UIView animateWithDuration:1.5
                          delay:0.0
                        options: UIViewAnimationOptionCurveEaseOut
                     animations:^{
                         _animationButton.frame = frame;
                     }
                     completion:^(BOOL finished){
                         NSLog(@"Done!");
                     }];
Swift:
var frame = self.animationButton.frame
frame.origin.y = 100
frame.size.height = 200

UIView.animate(withDuration: 1.5, delay: 0.0, options: .curveEaseOut, animations: {
self.animationButton.frame = frame
}) { (true) in
print("Done")
}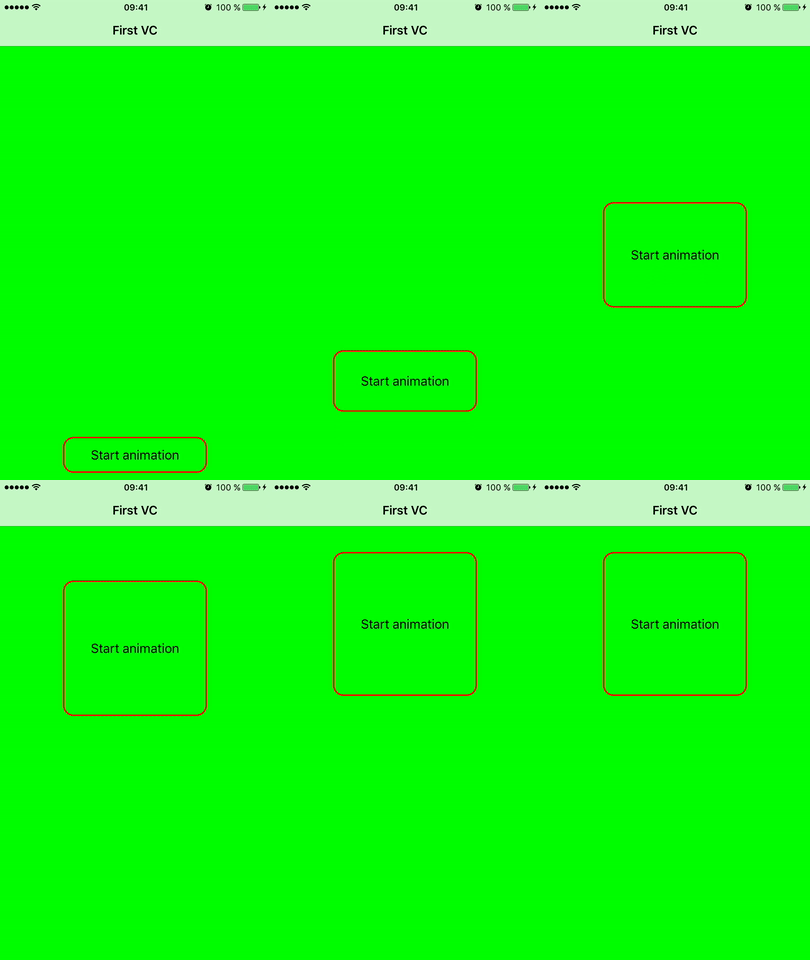
The first parameter here is animation speed, the second parameter is delay and the third parameter is an options parameter, i.e., it determines the way the animation is going to play out.
Animation playback options:
- UIViewAnimationCurveLinear — animation is executed with a constant speed during a set amount of time;
- UIViewAnimationCurveEaseOut — animation starts out quickly and slows down near the end;
- UIViewAnimationCurveEaseIn — animation starts out slowly and speeds up near the end;
- UIViewAnimationCurveEaseInOut — animation starts out slowly, speeds up and then slows down again.
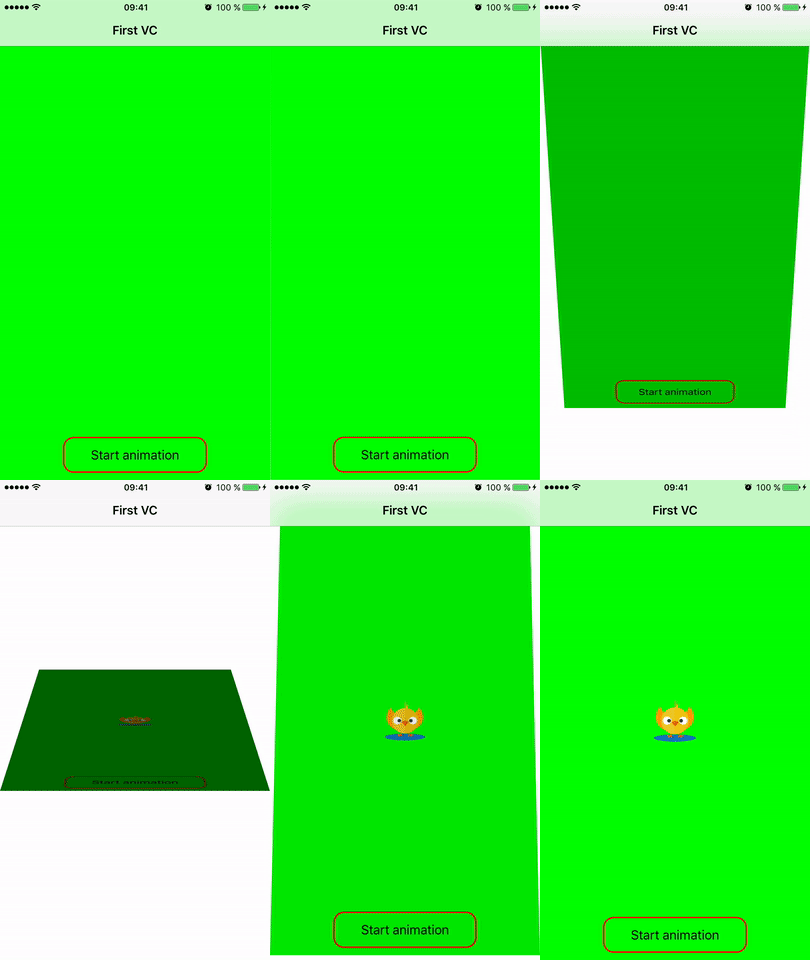
There are animation blocks in which animation transitions between UIView take place or in which elements for UIView are added (like in the example below). In these blocks, transitionWithView is used; it is required for animated transition or presenting UIView or objects inherited from UIView.
[UIView transitionWithView:self.view duration:1.5
                       options:UIViewAnimationOptionTransitionFlipFromBottom
                    animations:^ {
                        [self.view addSubview:self.imageView];
                    }
                    completion:^(BOOL finished){
                        if (finished) {
                            // Successful
                        }
                        NSLog(@"Animations completed.");
                        // do something…
 }];
Swift:
UIView.transition(with: self.view, duration: 1.5, options: .transitionFlipFromBottom, animations: {
            self.view.addSubview(self.imageView)
}, completion: nil)
The result will look like this. In this example we add an image on UIView with animation:
The UIImageView object displays one image or a sequence of images in an animated interface. We can animate UIImageView without using blocks and animations like CABasicAnimation. UIImageView has the following properties: animationImages, animationDuration, animationRepeatCount. This means that we can send an array of images that we need to play into animationImages to start UIImageView animation.
_chicken = [[UIImageView alloc] initWithImage:[UIImage imageNamed:@"chicken_normal_fly_1.png"]];
[_chicken setCenter:CGPointMake(150.f, 400.f)];
NSMutableArray *flyAnimFrames = [NSMutableArray array];
for(int i = 1; i <= 8; ++i) {
[flyAnimFrames addObject:[UIImage imageNamed:[NSString stringWithFormat:@"chicken_normal_fly_%d.png", i]]];
}

_chicken.animationImages = flyAnimFrames;
_chicken.animationDuration = 0.25f;
[_chicken startAnimating];
Swift:
var imgListArray :NSMutableArray = []
for countValue in 1...8 {
var strImageName : String = "chicken_normal_fly_\(countValue).png"
var image = UIImage(named:strImageName)
imgListArray.add(image as Any)
}
self.imageView.animationImages = imgListArray;
self.imageView.animationDuration = 0.25
self.imageView.startAnimating()
Conclusion
This was an


